|
"Be the ball!" Ah, that sage advice offered by Chevy Chase in one of our alltime favorite movies, Caddyshack, should be kept in mind by photographers who hoist a camera on the links.
That's the bad news. The worse news is that golf is one of the hardest sports to photograph. There's no physical contact between players, the course is tremendous and the ball is tiny and travels very rapidly through the air. It's hard to get a good angle without impairing the golfer's concentration or risking getting conked by an errant drive. Good golf photography is hard. As NYI students have learned, we say "If it's hard, that's terrific!" Because if it's hard, most people won't do it, and therefore the benefits and rewards will flow to those that do. With those words of encouragement, let's turn to the job at hand. The photographs you can take on the golf course can be broken into several distinct types: The basic action photos are "big swing" pictures of golfers driving off the tee or hitting long shots in the fairway; players blasting out of sand traps and other hazards; and finally, putting on the green.
NYI's Three Guidelines are best recounted in the form of these simple questions you should ask yourself before pressing the shutter on your camera:
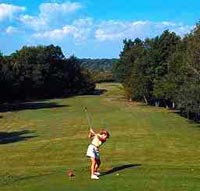
Particularly with a subject such as golf, the action of your photo is likely to be so minimal that if there are distractions they will seriously interfere with your photo. Look at the example to the right.
If you are unfamiliar with NYI's Three Guidelines we strongly suggest you look at this month's Picture of the Month feature. Each month we take an interesting photograph and give it a thorough analysis using NYI's Three Guidelines. Now let's look at some good examples of the various types of golf photos.
While it may be hard to capture that perfect golf action photo of the key shot made by the big star that won the major tournament, we guarantee if you follow the advice in this article, you'll be able to take great golf photos of your friends and family next time you head out to your local course. Think of the benefits -- fresh air and a camera that is much lighter to tote than a bagful of clubs. What could be more pleasant than a round of golf without having to worry about whether you break par? Reprinted with permission from a monthly edition of the New York Institute of Photography's web site.
|